


What you will need :
An idea for the skin that you want
Skin edit to make your custom skin
Step one :
Open Skin Edit. You’ll see a blank template and a preview of your character in-game on the bottom right screen.
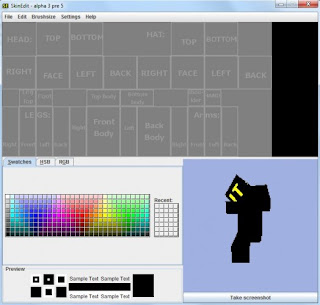
Step two:
Start drawing and filling in the blanks. Don’t worry too much about making it perfect the first time. You can see in real time what your character will look like in that preview in the bottom right. Click on it to make the model stop running or turn it with your mouse to see how your character looks like from another angle.
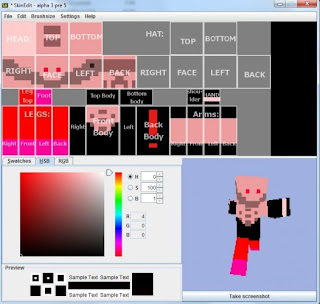
Step three:
Once you are satisfied with your work, save the image anywhere on your computer. Navigate to the Minecraft Preferences page in your browser and upload the file of your new skin that you just saved onto your computer.

Taken from PCGamer Magazine
14 comments:
Awesome information! Minecraft is great to personalize!
-annmouse
Sweet, I'll have to try this
Sweet, I've been looking for a tutorial on this. Can't wait to make an awesome new avatar!
Ill make some skins now! Thanks!
This is very useful, thank you!!
nice post!!!!
I love minecraft!
Wow! Interesting post!
That's great, gonna try it right now!
Cool. I was looking for this information.
good to know thanks for the nice tut :)
im new to minecraft ill try this :D
Sweet ! will be awesome to try out
ty nice tut i like =)
Post a Comment